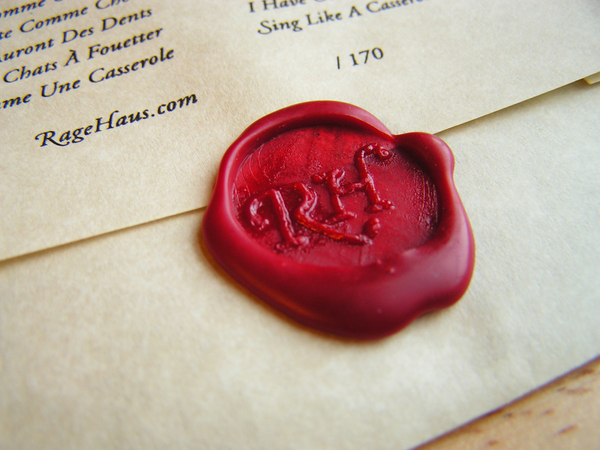
This is a wooden wax seal tutorial I created and used on my S'amuser Avec Le Français project.
This tutorial was featured on Design*Sponge. After it was featured, Grace also asked me to be in her upcoming Design*Sponge book. The only thing was that I had to create a seal specific to Design*Sponge. Here are pictures from that wax seal. That book is set to published 2011. I can't wait!
This tutorial was featured on Design*Sponge. After it was featured, Grace also asked me to be in her upcoming Design*Sponge book. The only thing was that I had to create a seal specific to Design*Sponge. Here are pictures from that wax seal. That book is set to published 2011. I can't wait!

Wooden Wax Seal Tutorial
Before you begin, make sure you have access to all of these items:
wooden dowel
wood burning tool with a fine tip
pencil
printout of design
xacto knife
sandpaper
tape
stain
old rag
vegetable oil
paper towels
sealing wax
matches
Before you begin, make sure you have access to all of these items:
wooden dowel
wood burning tool with a fine tip
pencil
printout of design
xacto knife
sandpaper
tape
stain
old rag
vegetable oil
paper towels
sealing wax
matches

1. Prep the dowel by sanding the end you plan on using as the seal. Try to get out the little dings and scratches, otherwise they will show up in the wax impression.
2. Measure the exact diameter of the wooden dowel and design your seal. If you are designing a simple monogram, such as our RageHaus seal, you can easily design it in a variety of computer applications. Start by drawing a circle that is the exact diameter of the dowel with a thin stroke. Then arrange the letters within the circle. Keep in mind that you should keep the detail relatively simple unless you have a lot of experience carving small detail into wood.
2. Measure the exact diameter of the wooden dowel and design your seal. If you are designing a simple monogram, such as our RageHaus seal, you can easily design it in a variety of computer applications. Start by drawing a circle that is the exact diameter of the dowel with a thin stroke. Then arrange the letters within the circle. Keep in mind that you should keep the detail relatively simple unless you have a lot of experience carving small detail into wood.

3. Print the final design and cut out the letters with an xacto knife. Think of this step as making a stencil. Keep in mind that it doesn't have to be perfect, but you do want to capture the structure of the design.


4. Flip your stencil so it reads backwards and trace the image onto the dowel. Remember that your design needs to be backwards on the seal so the impression it leaves reads correctly. Tape the stencil onto the dowel and trace your design. Once you have a good trace, take off the stencil and fill out the design where you see fit.


5. Carve out the design with the wood burning tool. They are readily available in most craft stores and come with a fine point tip that can capture small detail. As you carve your design, keep the depth you carve relativity the same for the entire design so you can create an even, smooth impression in the wax.

6. Seal the wood with stain. Wood is a porous material and to prevent the wax from sticking to the seal, you need to seal the wood with stain. Once you have stained your seal, put it in a warm place to dry overnight. You don't want to worry about getting stain on your hands or on your envelopes.
7. Gather the sealing wax, matches, oil, paper towels and an envelope. This process goes quickly and it is important that you have everything you need right in front of you. After you are sure your seal is dry, you can test it. I tried testing mine with candle wax at first, just to see if the impression was coming out correctly. However, if you seriously want to seal envelopes, then I would invest in proper sealing wax. You will find that it has a thick viscosity that creates a strong seal.
7. Gather the sealing wax, matches, oil, paper towels and an envelope. This process goes quickly and it is important that you have everything you need right in front of you. After you are sure your seal is dry, you can test it. I tried testing mine with candle wax at first, just to see if the impression was coming out correctly. However, if you seriously want to seal envelopes, then I would invest in proper sealing wax. You will find that it has a thick viscosity that creates a strong seal.

8. Have your envelope in front of you with the back facing up. If the flap you want to seal doesn't lay flat then you should weight it down. I used my xacto knife to do this.
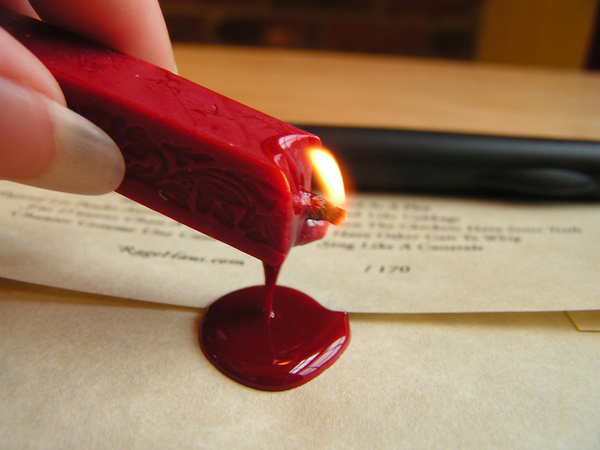
9. Hold the sealing wax over the area you want to seal and light the wick. Give the flame a chance to strengthen before you tip the wax to begin dripping it. Once you get a good drip going, keep an eye on the diameter of the wax puddle in relation to the diameter of the seal. This will take practice figuring out how much wax you will need, so don't get frustrated if you don't get it on the first try.
9. Hold the sealing wax over the area you want to seal and light the wick. Give the flame a chance to strengthen before you tip the wax to begin dripping it. Once you get a good drip going, keep an eye on the diameter of the wax puddle in relation to the diameter of the seal. This will take practice figuring out how much wax you will need, so don't get frustrated if you don't get it on the first try.

10. Give the wax about 15 seconds to set up, in the mean while prep the seal for action. While I let the wax set-up a bit, I like to take this time to prep my seal by dipping the tip in oil. This gives you double the protection from having the wax stick to the seal. Blot the excess oil on a paper towel and make sure you wipe down the edges of the seal.

11. Press your seal gently, but firmly in the wax and let it sit. Let the wax dry completely before removing the seal. When you are sure that the wax is completely dry, start to wiggle the seal back and forth gently until you feel the seal release from the wax.


12. Voilà! A seal is made. With a little practice it will get easier. You can also use this impression to go back and fix anything you might not have noticed while carving out the design.

