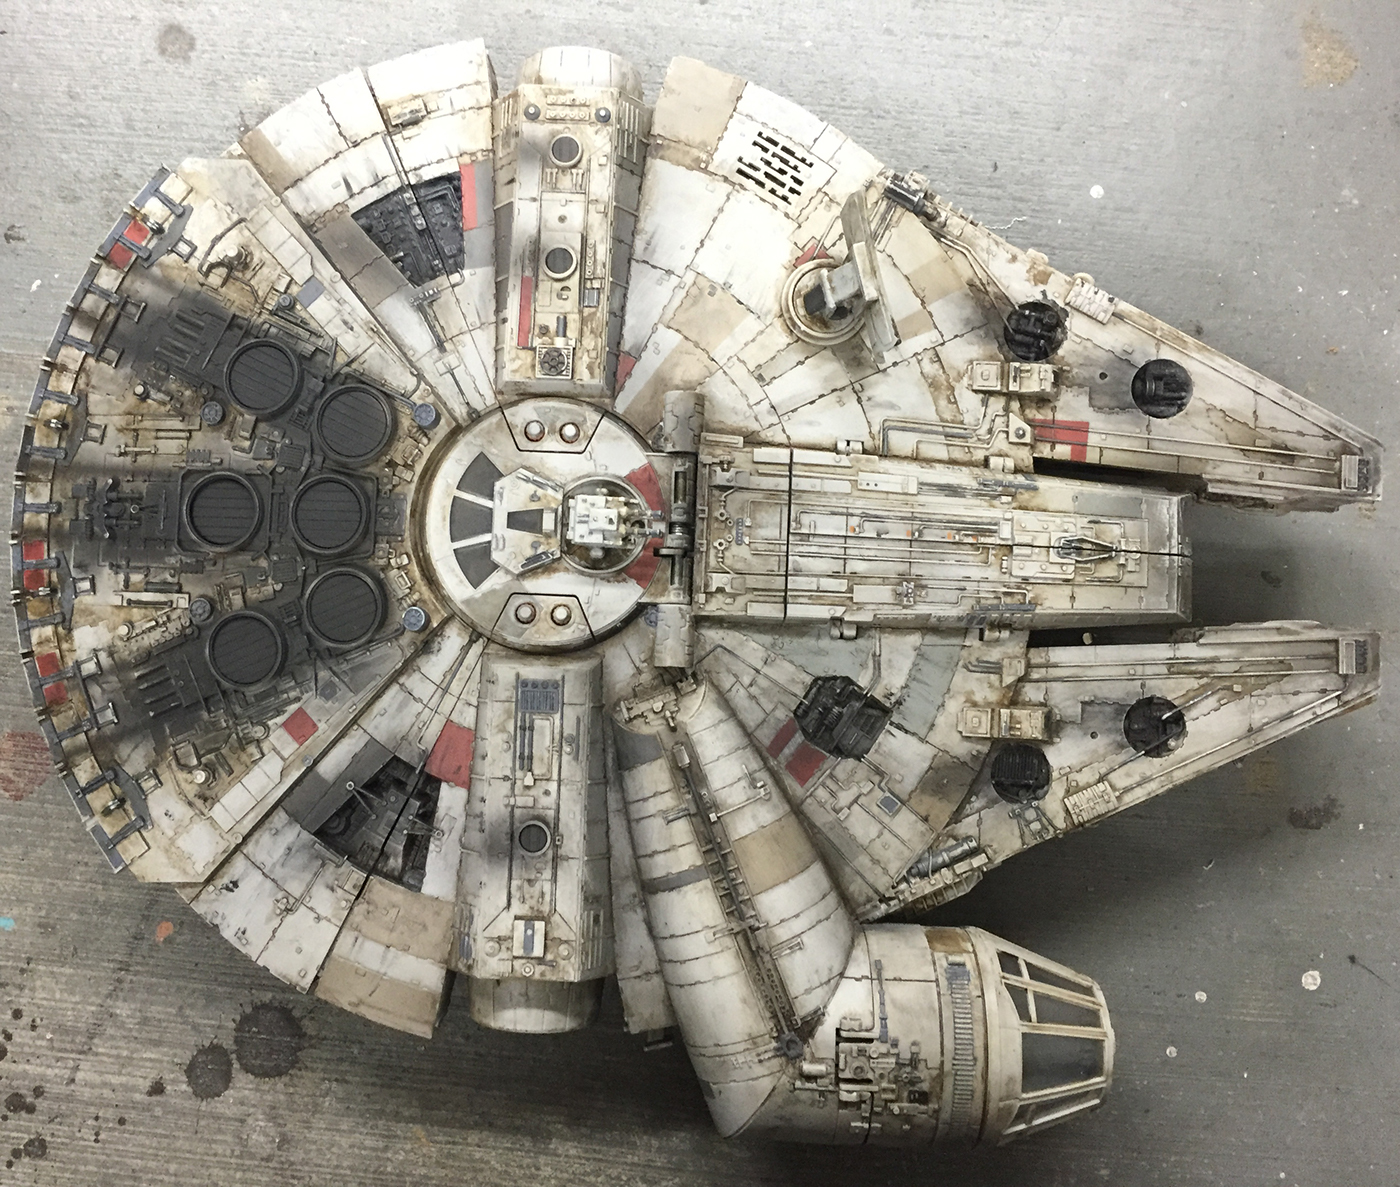
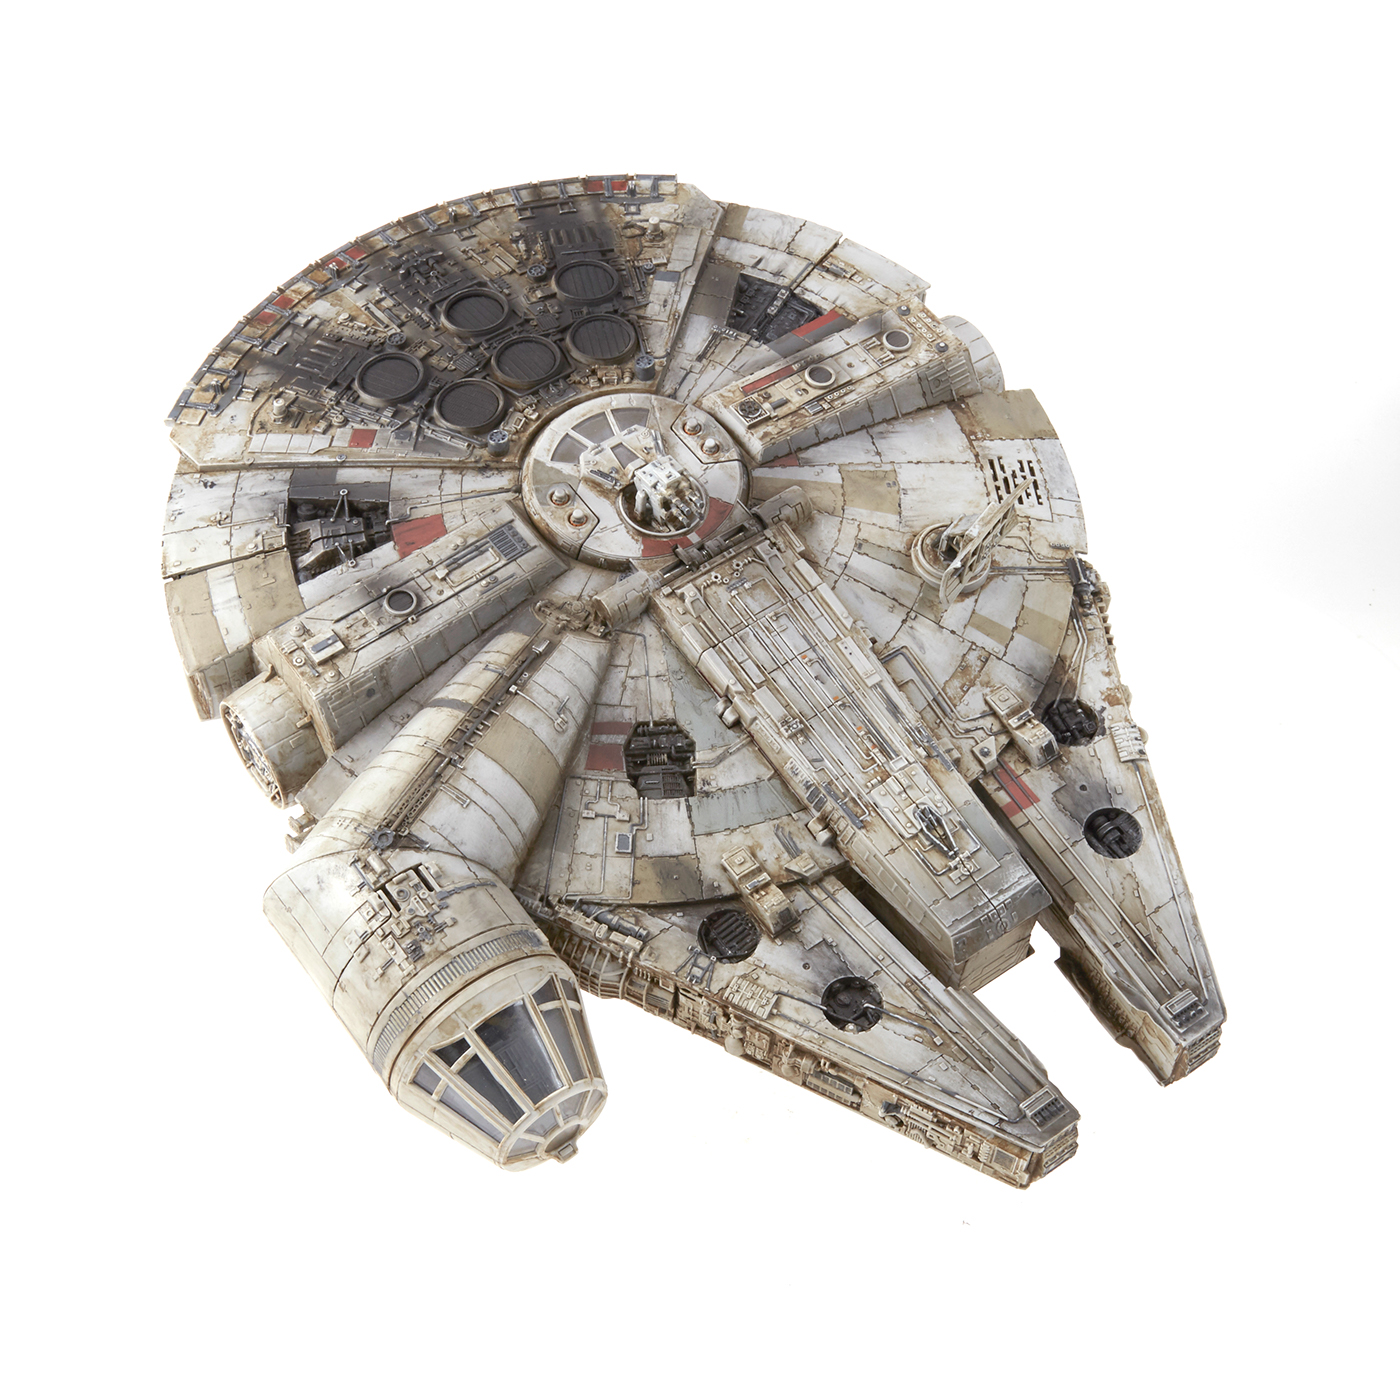
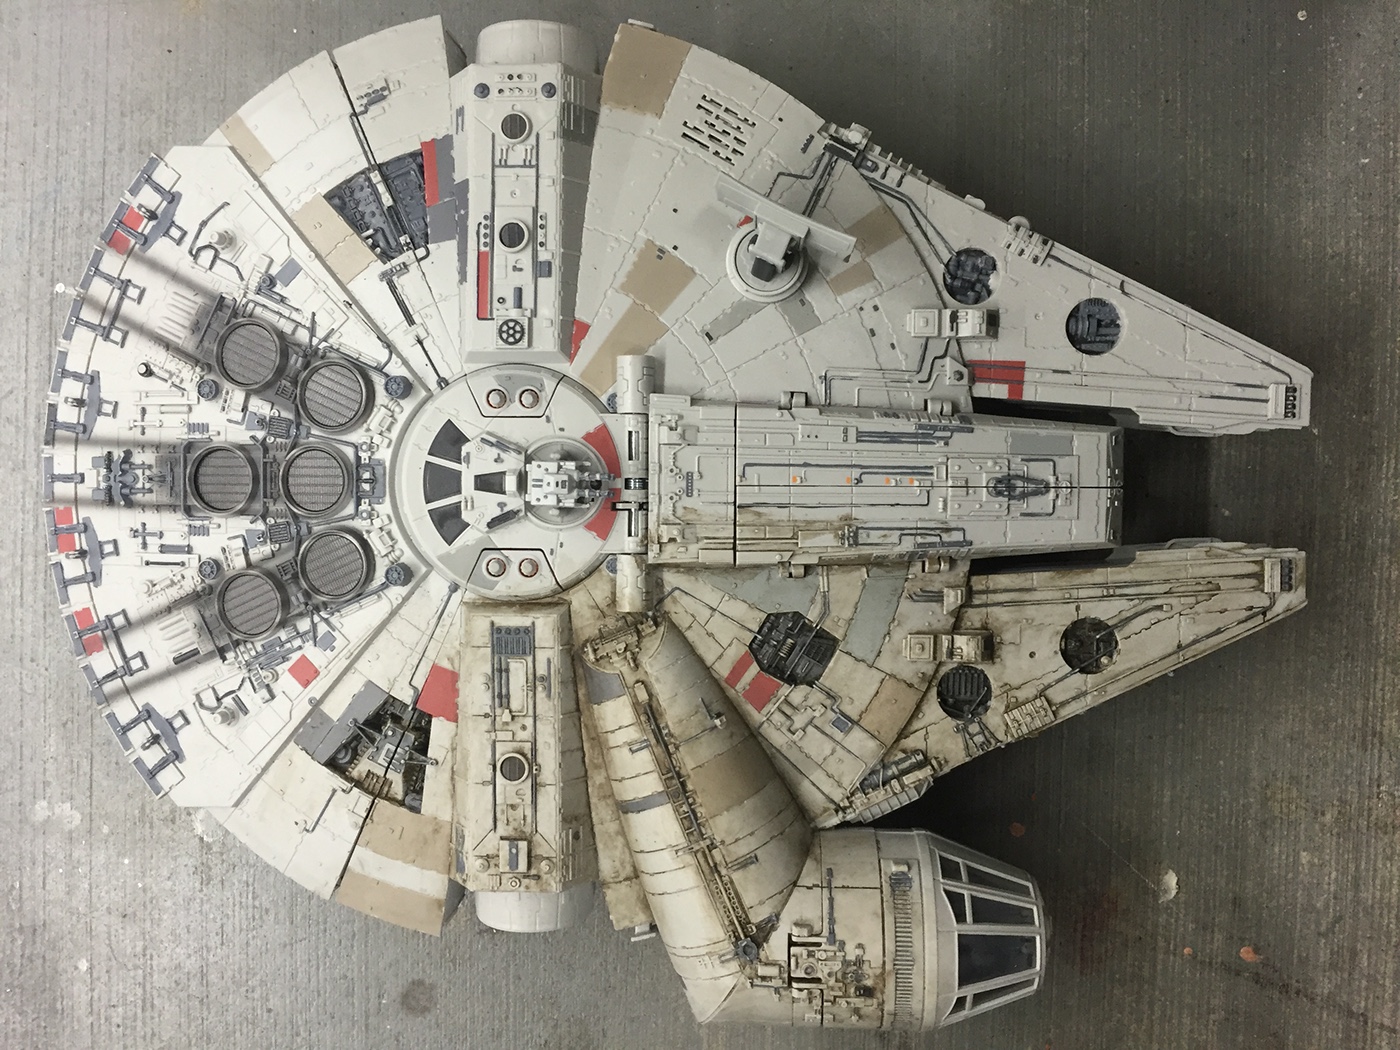
The Hasbro Battle Action Millennium Falcon! You can find them at Walmart/Target/Amazon/Any major Toy Store for ~$100. This thing is pretty big, almost 18" long and would look great hanging on my wall. Just one issue...
this thing looks way too new to have been sitting abandoned on Jakku. Time to get to work! The level of detail on the sculpt is great, and most of the panel colours are correct. A perfect base for some weathering!

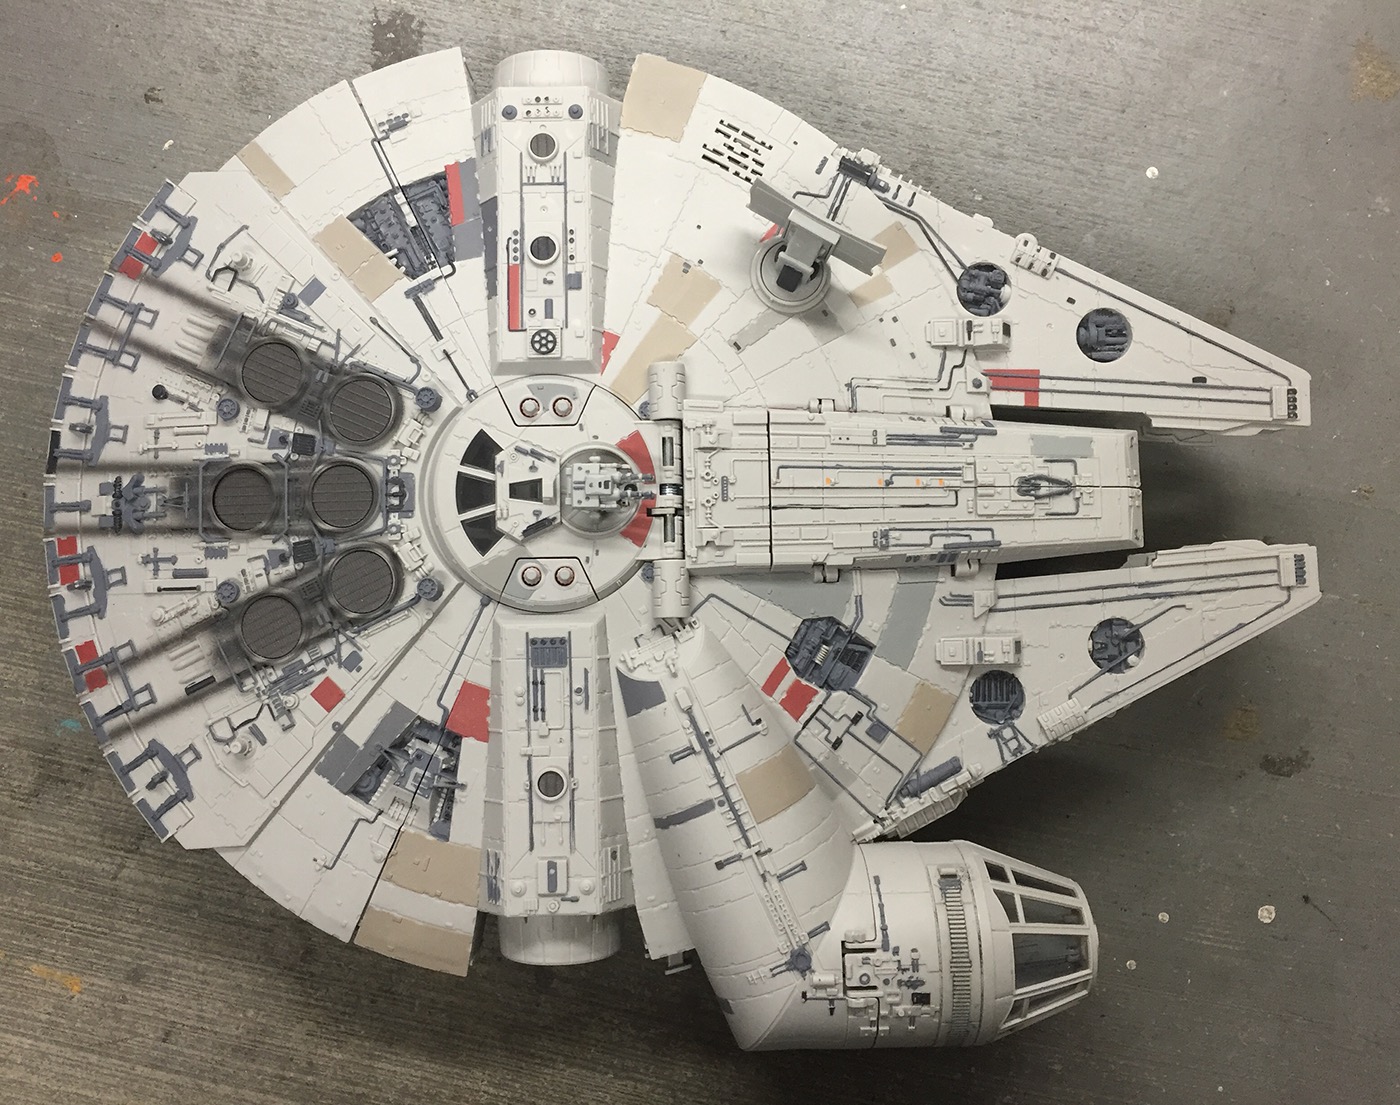
The first step is to highlight some of the sculpted details. In the Star Wars universe everything is modified, worn, and repaired. I really can't imagine Han Solo (or any other owners of the Falcon) breaking out a can of paint and matching the colour of any parts they add or salvage. Therefore: I painted anything that looked "added on" a different shade of gray.

I also added some gray to the mechanical elements near the rear exhaust to boost the overall contrast of the ship.

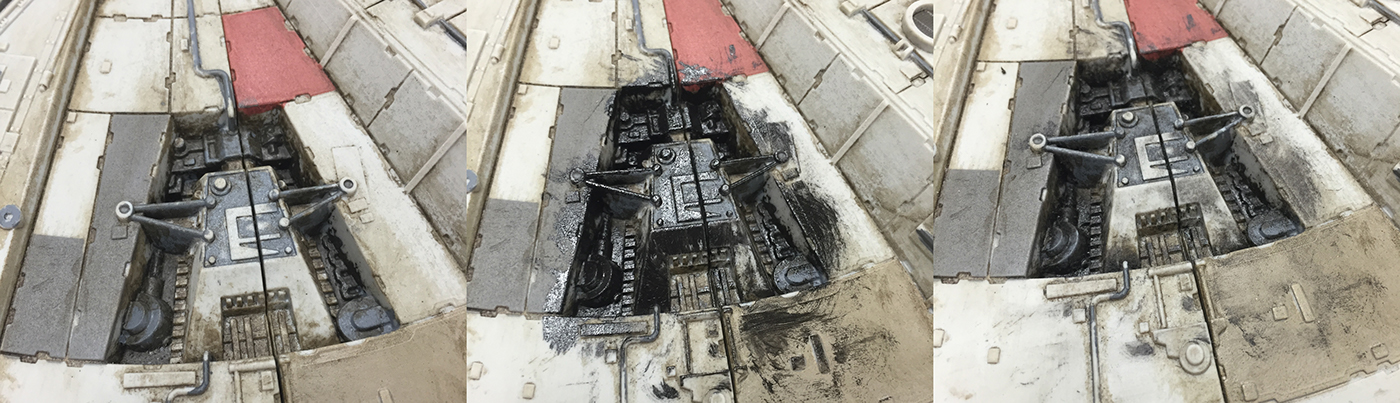
The easiest way to add detail is to apply a decent ammount of paint to an area that has some recesses First pass at adding details. After this I rubbed the whole thing down lightly with a brillo pad. This helps create the illusion that the original paint on the falcon is peeling off of some areas.
First pass at adding details. After this I rubbed the whole thing down lightly with a brillo pad. This helps create the illusion that the original paint on the falcon is peeling off of some areas.
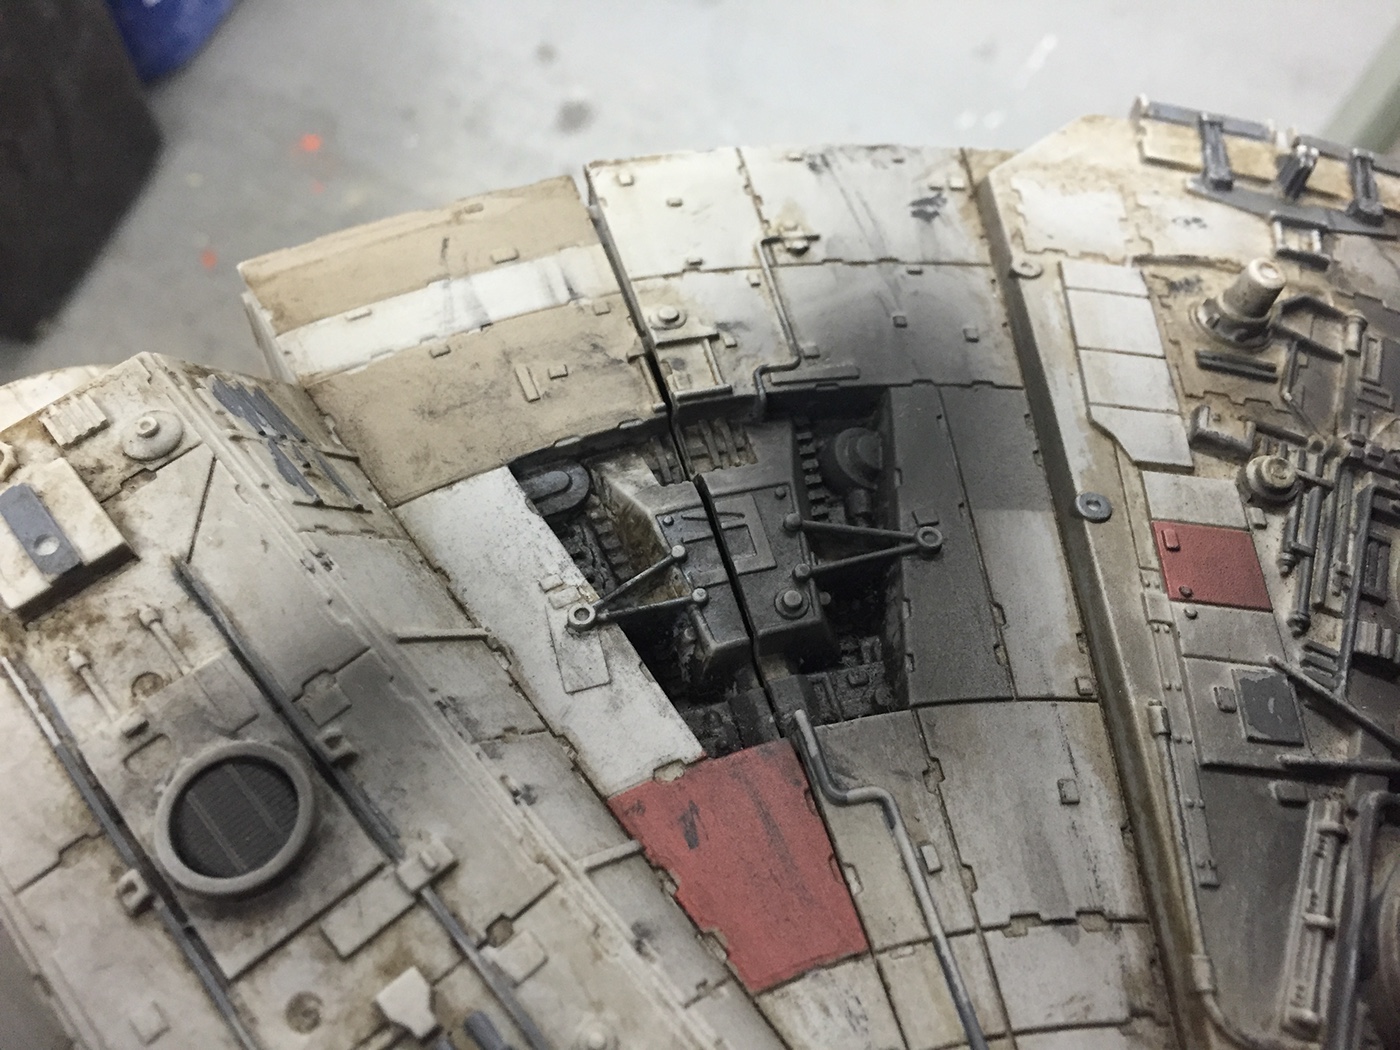
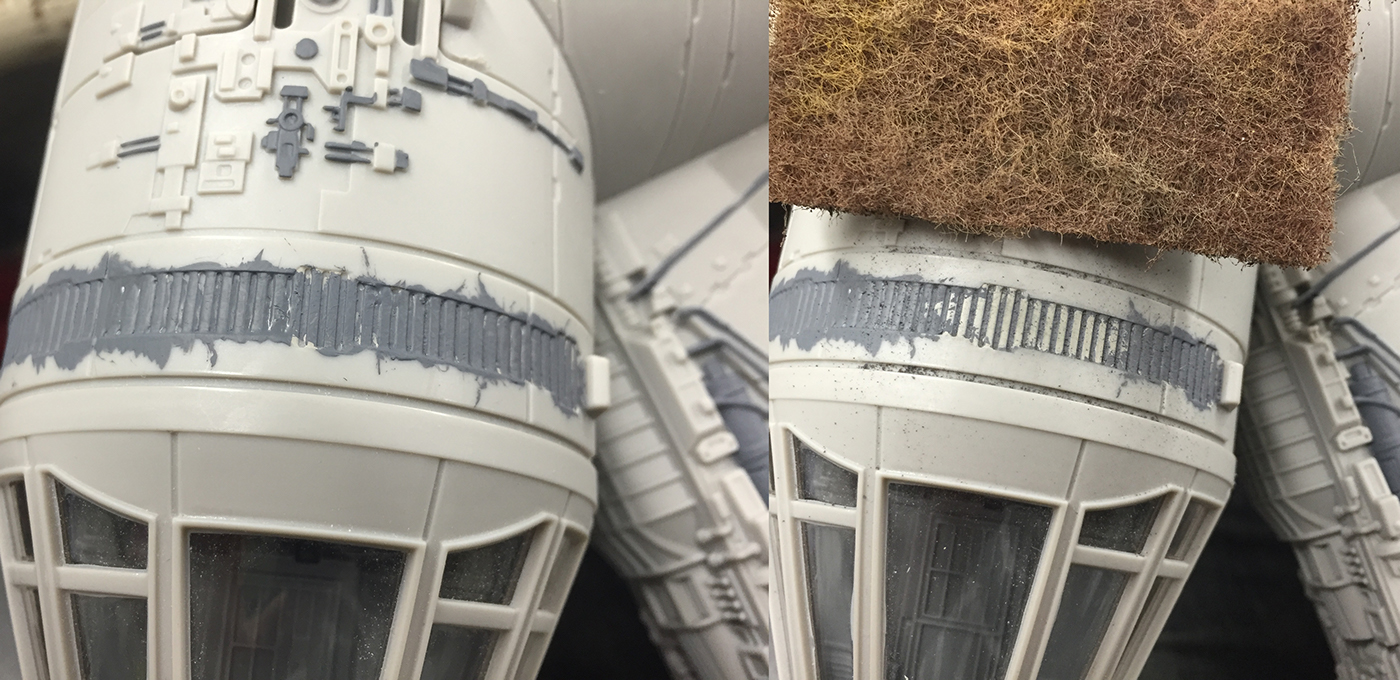
Here you can see some of the paint that was chipped away. This is also the first spot I will start really weathering. I applied a thick layer of brown acrylic paint and then immediately wiped away as much as possible. I am not too worried about the residual paint ring around the area, it will all blend together and create layers of "dirt".

Starting to work my way around the Falcon...

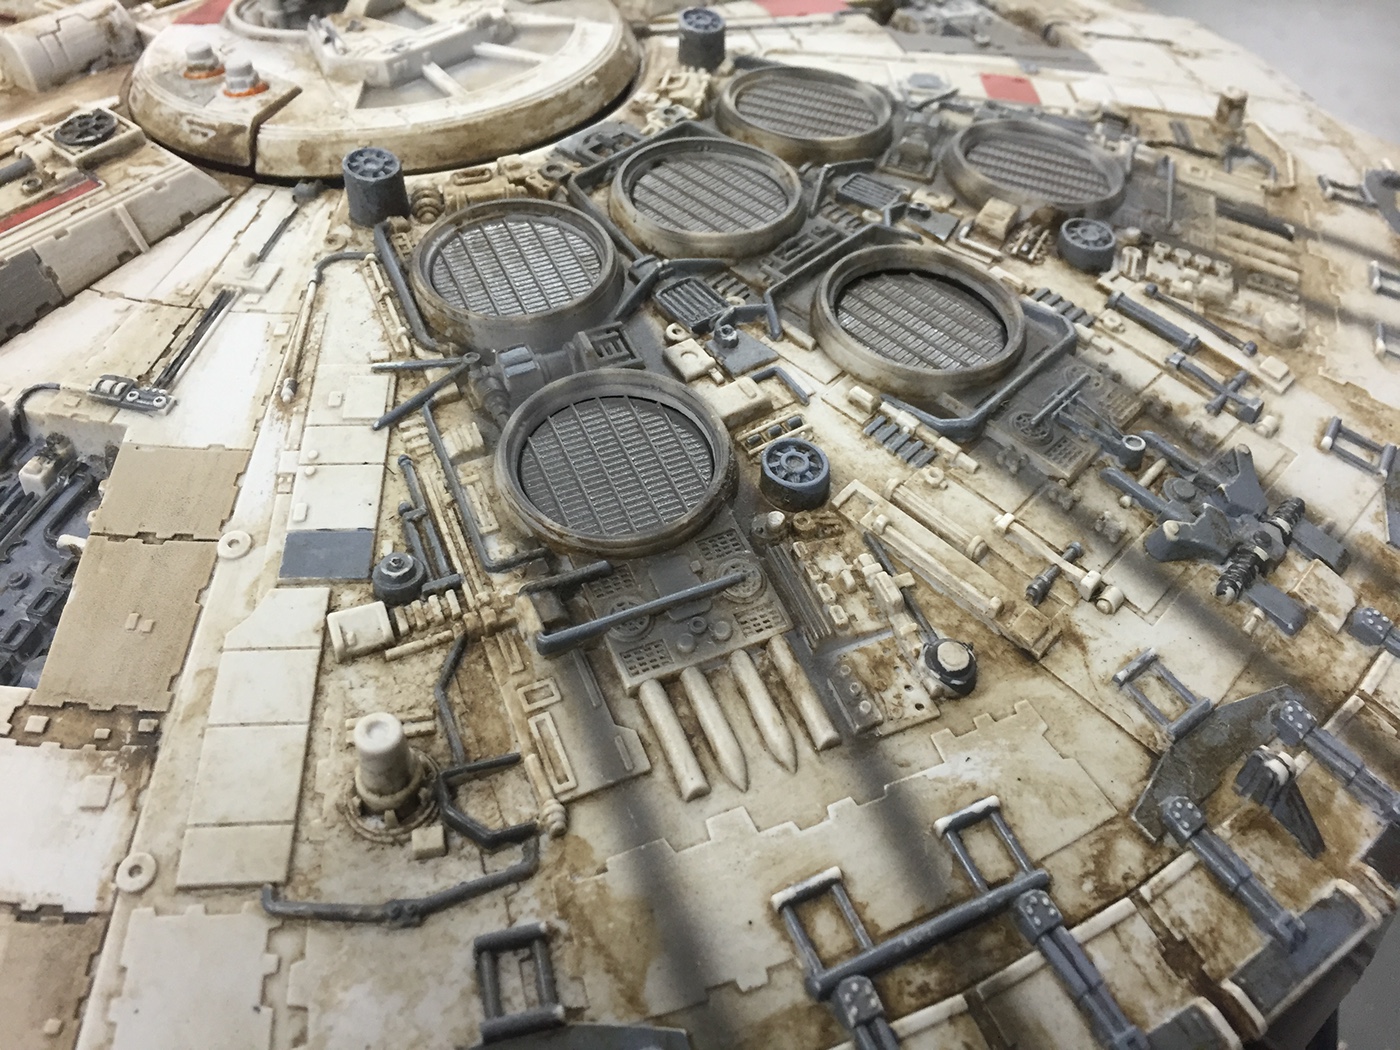

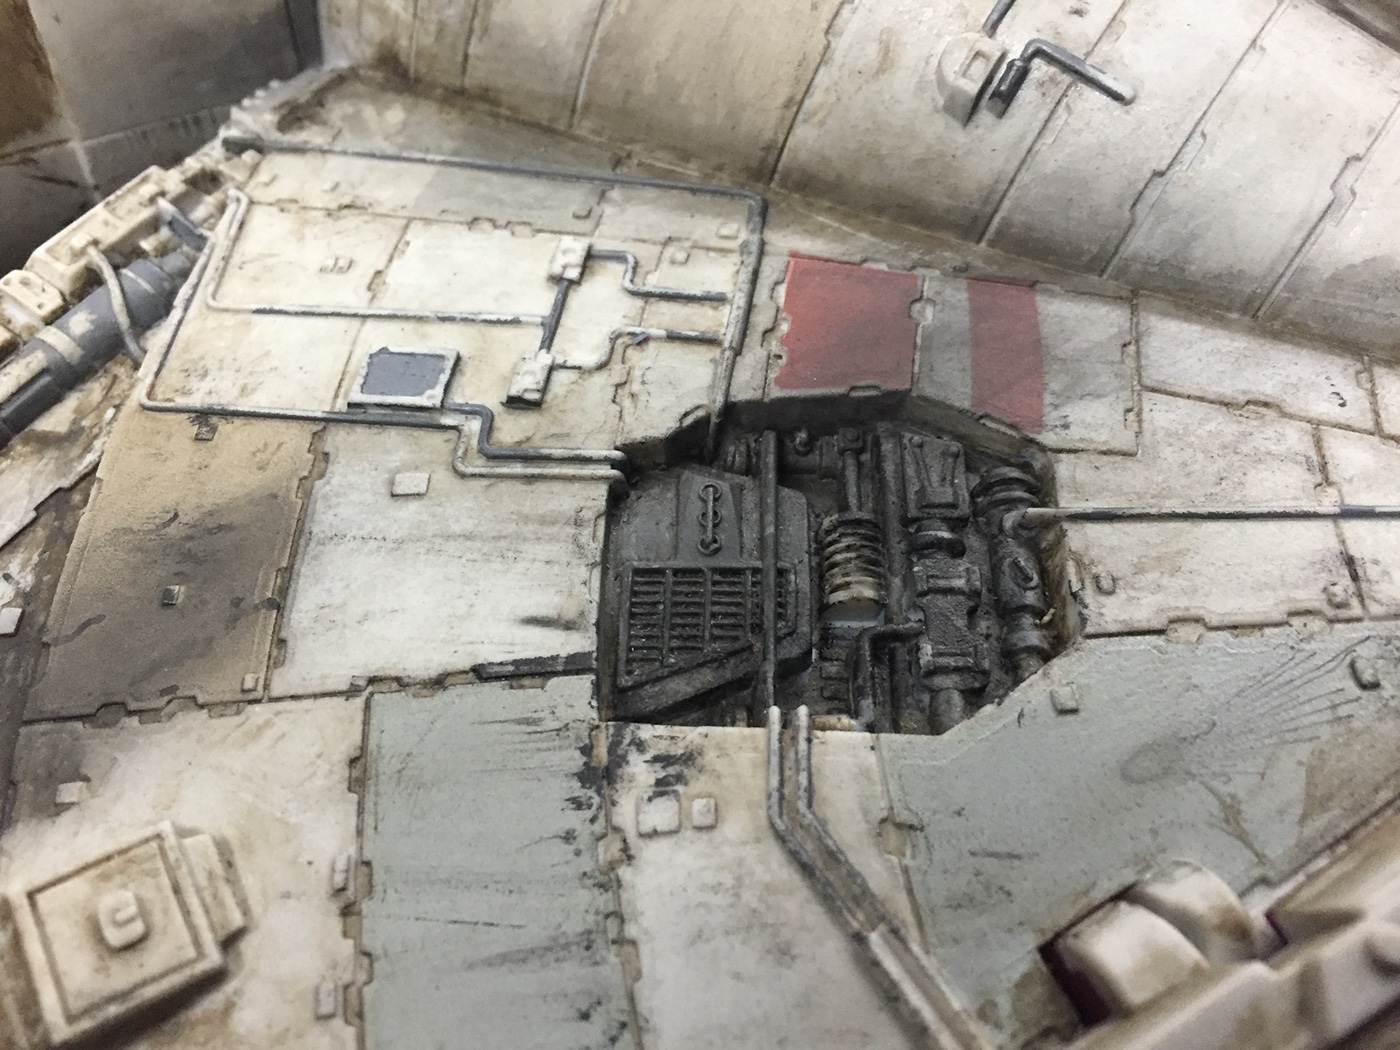
Grease and dirt would buildup signifigantly in mechanical areas like these. Apply another thick layer of black acrylic and wipe it away.
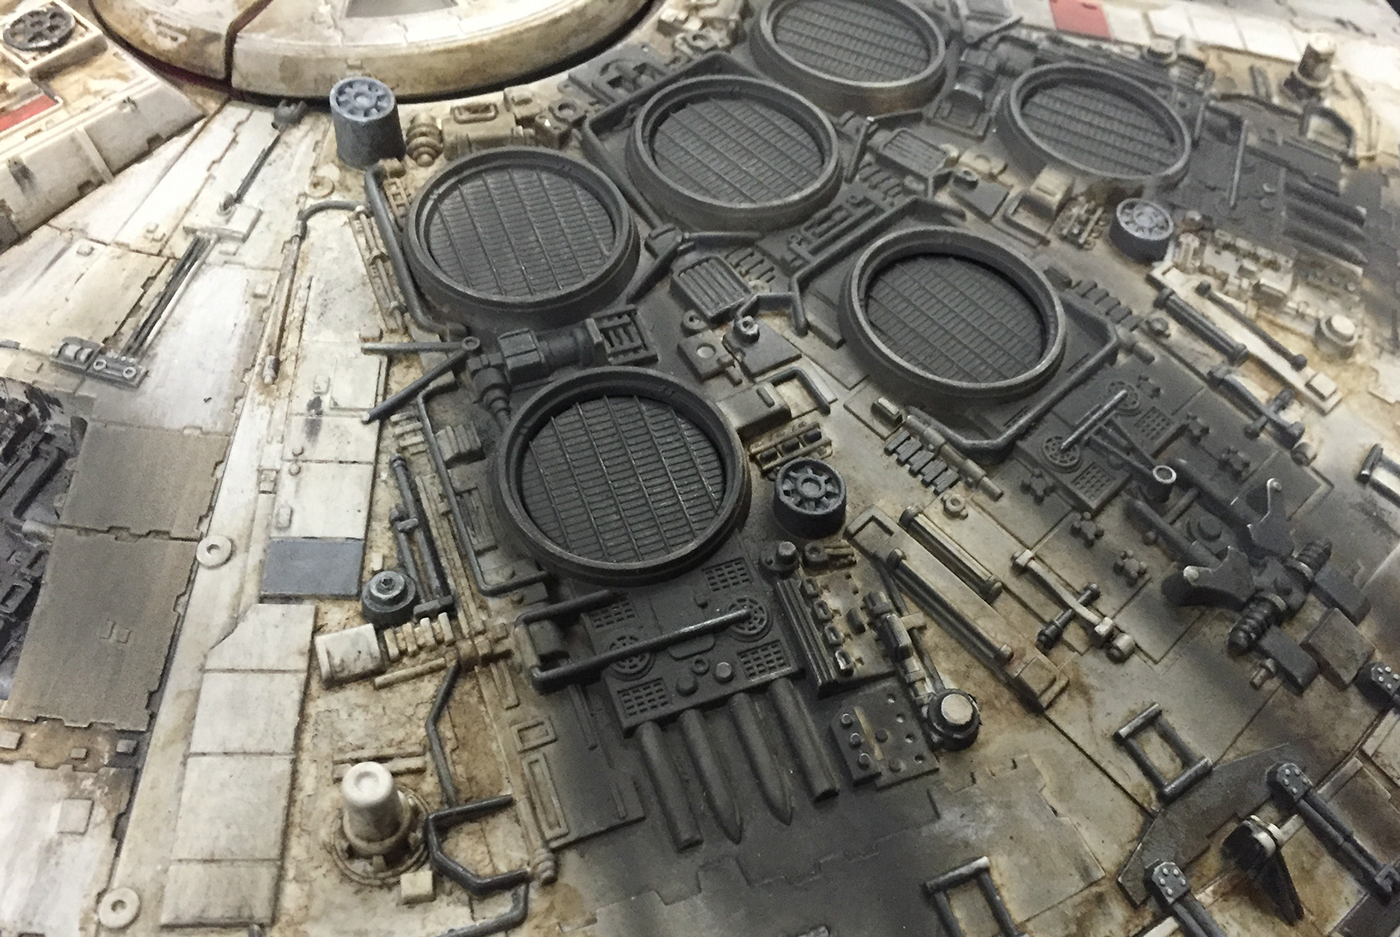
Adding airbrushed details to the vent areas

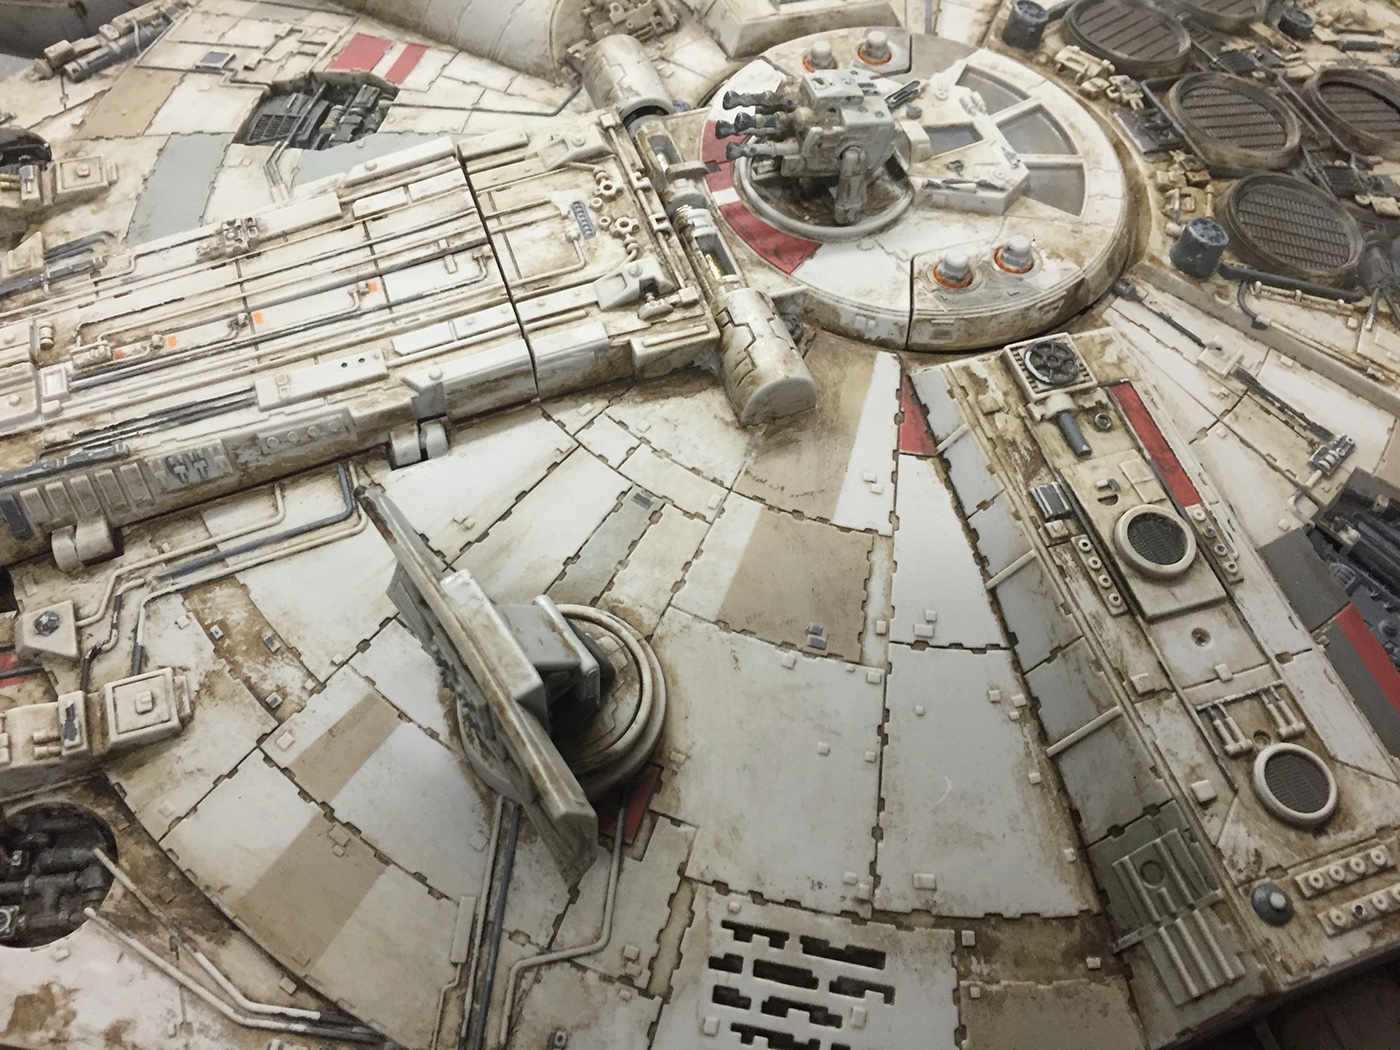
If you look at the Falcon you will notice there are lots of spots where dirt and dust has left streaks across the hull. To simulate these there are two basic techniques, both of which I use to create a varied effect. The first step with both is to apply a small amount of black paint then take your finger and (applying some light pressure) wiggle it back and forth a bit. Remove your finger and wipe away any excess paint. I tried to make sure that I wiped away excess paint radially away from the center of the Falcon to stay consistent with the reference photos I had. To create an "impact mark" apply paint and then quickly wipe it down and away with your finger. This takes some practice, but it gives great results. This can also be achieved with an airbrush.